Thursday, October 1, 2020

Furniture Painting 101: Step One

 Hey there!  I hope you guys are doing well.  It's been a long time and life has been crazy.  Since I'm no longer selling painted furniture or furniture paint anymore, I thought I would share some tips and tricks for painting and refinishing furniture.

I know there are many paint brands out there that call themselves "no prep" paint.  Unfortunately, that just is not true.  All furniture no matter how big or small needs to have some prep work done in order to have a beautiful finish.

So first things first, you need to give your furniture a good cleaning.  Using a degreaser product is the best place to start.  Now you may be thinking why do I need a degreaser for a bedroom dresser?  The answer to that is FURNITURE POLISH!  Furniture polish is full of oils and waxes that can leave a greasy build up on your furniture pieces.  That greasy build up will act as a resist and keep the paint from sticking to your piece.

You can use products like TSP- tri-sodium phosphate, Krud Kutter, or Simple Green.  


I also like to use a green scour pad.  It really gets in there to removed the build up and it also does a little pre-sanding.


Make sure you rinse your piece well after cleaning and allow it to dry thoroughly. 

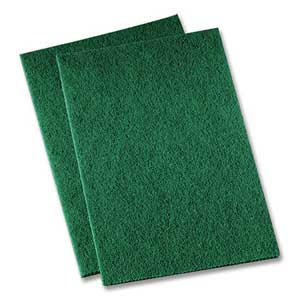
Once your piece is completely dry, you can give your piece a light sanding to give it a little tooth for the paint to adhere to.  You can do this with a 220 grit sanding sponge.  If the old finish is really shiny and smooth, you will want to bust out the power sander and give that finish a good scuffed finish.  The boutique furniture paints will not stick to a shiny surface without scuffing or using primer.


When you are finished scuffing/sanding, wipe the dust off or use an air compressor to blow the dust off and you are almost ready to paint.

Check back for the next steps in the furniture painting process!

Happy Painting!

Tricia


Monday, August 26, 2019

Paint Parties!

I've decided to start offering Paint Parties!  Have them at your home, church, favorite restaurant, etc.  You choose your location and I'll bring all of the paint and supplies.  You just need to make sure you have enough tables and chairs for all of your guests.

As the host/hostess, you will receive your sign for FREE with 5 paid guests!!!

Message me through Facebook or email me to schedule your party!  I'll set up a private link for you and your guests to register and pay.

I'm currently booking September and October.

We will be painting a 10" x 30" nativity sign to enhance your Christmas decor.

Choose from 2 sayings:

* Silent Night, Holy Night
* For Unto Us a Child is Born

There is a FRAMED and UNFRAMED option.  Unframed is $40 and Framed is $50.  Frames will be stained dark walnut but can be painted at the party if you choose to do so.  You will choose from a white painted background or a stained background.  The nativity scene will be in your choice of color.


Happy Painting!!


Be sure to follow The Painted Chest on all of your favorite social media sites!


Thursday, September 21, 2017

MudPaint is Here!

We are proud to introduce MudPaint into our collection of paint lines.  MudPaint is a water based paint that is made is the USA.  It contains clay and other natural minerals.  While it does dry to a chalky finish, MudPaint does not contain chalk.

MudPaint paints beautifully and distresses easily to give you that wonderful farmhouse farmhouse finish.  It does not require a top coat, but we do encourage you to use one on high traffic surfaces such as dining tables, dressers, and coffee tables.  You can wax MudPaint or finish with their clear coat which is easily applied.

We will be debuting MudPaint at the Fall Gathering at Blue's Junk & Primitives on October 7th and 8th in Creal Springs, and at Pickin' at the Patch at Rendleman Orchards on October 14th in Alto Pass.  You can be one of the first to purchase MudPaint at these amazing events.  Afterwards, I will have the MudPaint available at Turquoise Door in Ava along with my Miss Mustard Seed's Milk Paint.


Be sure to follow The Painted Chest on all of your favorite social media sites!


Tuesday, May 17, 2016

Have you heard? The Painted Chest has moved!


That's right, The Painted Chest has MOVED to a NEW location!!

We are now located inside The Turquoise Door at 220 West Main Street, in Ava, Illinois.  We are so pleased to a part of Kasey's wonderful store.  We will have available, our hand painted vintage and antique furniture, Miss Mustard Seed's Milk Paint, and farmhouse style home decor.  We also have the old formula of DIY Paint on clearance.  It's almost gone so get it while you can.

Besides our great items, The Turquoise Door also features many handmade and upcycled items from local artisans.  Those items include home decor, garden art, jewelry, children's boutique clothing, and all natural soaps and lotions.

Make a day of shopping in Ava and have a great lunch while you are there!  Visit The Brick Wall Boutique for ladies clothing and have lunch at Brunzeez Cafe or sit out on the patio at Gabby's for lunch and drinks.

I hope to see you in the shop soon!!


Tuesday, April 12, 2016

Apron Strings and Dried Lavender Retiring

Miss Mustard Seed's Milk Paint is retiring the colors Apron Strings and Dried Lavender.  Get these lovely colors before they are gone for good.  


Friday, February 12, 2016

Shop DIY Paint Online!


You can now shop DIY Paint by Debi's Design Diary by clicking HERE!  Shop from the comfort of your own home and have your paint shipped directly to your door.


Be sure to follow The Painted Chest on all of your favorite social media sites!


Monday, January 4, 2016

Antique Buffet Painted in Mermaid Tail DIY Paint


You guys, I am SO excited about this piece!  The pictures do not do it justice!

This antique buffet was a family heirloom for one of my clients.  It has definitely seen better days.  It had previously been painted and stripped and left sitting for a long time.  It was very wobbly and the doors were broken and warped.  My hubby went to work right away making it sturdy and taking the doors completely apart and gluing and clamping them back together.  Then it was my turn to work some magic.

 BEFORE


AFTER


My client wanted a very rustic, worn look in turquoise and I suggested a stained top.  If you've been following me long, you know that a stained top on any piece is my signature look.  I will say, that this was a little out of my comfort zone.  I don't typically do a lot of heavy distressing and I very rarely use dark wax.  It's just not my personal style.  However, I wasn't doing this piece for me or to sell, I was doing this for a client.


Since the wood was so light in color, I stained the entire piece in Java Gel Stain first.  When that was dry, I painted 2 coats of  DIY Paint in Mermaid Tail.  It's a bright turquoise/aqua color...but it wouldn't be for long.


When the paint was dry, I started distressing using a damp old sock.  DIY Paint is so easy and wonderful to wet distress.  No sanding dust in my house!  WooHoo!


The next day I applied dark wax directly to the paint.  No, I did not use clear wax first!  DIY Dark and Decrepit Wax can be applied directly to the paint without using a clear wax first.  Simply brush the dark wax on and immediately wipe away the excess wax.  You are then left with a gorgeous aged patina.


I love how the dark wax settle into all of the gorgeous details and nooks and crannies.


I have to say, this is probably one of my favorite pieces to date.  I wanted to keep it for myself.  :)  I ended up really loving the heavy distressing and dark wax.  Mermaid Tail was made for dark wax!


Be sure to follow The Painted Chest on all of your favorite social media sites!


I'm linking this project up to the DIY Like a Boss Party!
#DIYLikeaBoss Weekly Features